 LesLinq has been enhanced with several exciting new features. Below, we’ve listed the most important ones for you. Keep reading to discover all the details!
New way to download LesLinq projects
LesLinq projects can now be downloaded in two different ways:
- Download with LRS configuration: This option allows you to connect with your Learning Management System (LMS) or Learning Record Store (LRS). The data collected by LesLinq (whether the e-learning has been completed, the results, etc.) is stored in your LMS or LRS.
- Download only: This option lets you download the LesLinq HTML5 files in a zip file and install the project in your own environment or server. No data is stored on the LesLinq server with this method. This is ideal for making interactive content accessible through your own system, where learner data doesn’t need to be stored.
How does it work?
From the project dashboard, select the project you want to share. Click on the three dots next to the project title and choose ‘Download.’
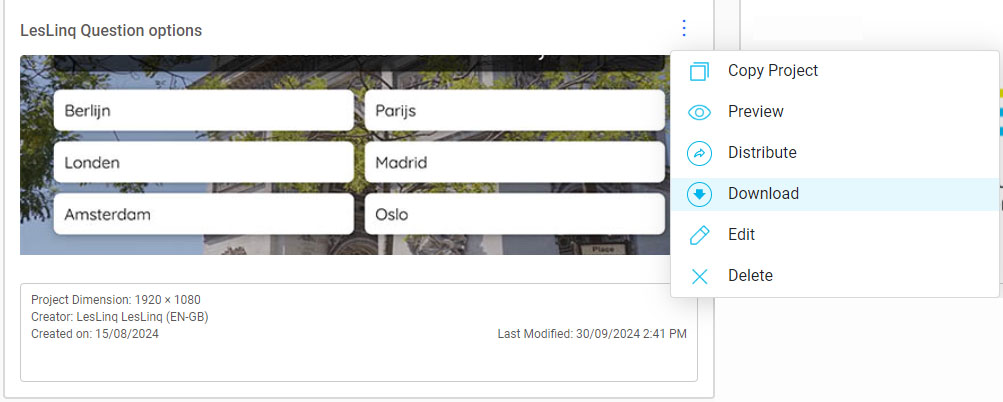
You will then see the following menu:
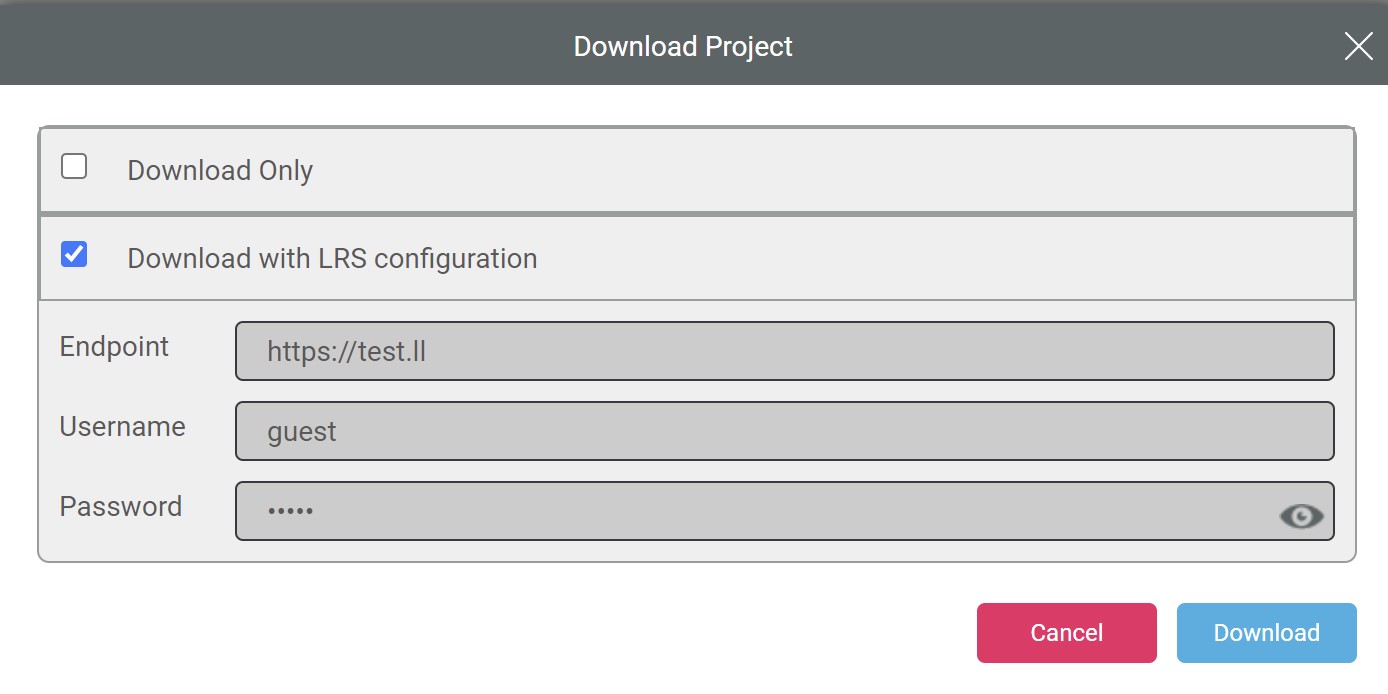 If you select ‘Download Only,’ the files will be downloaded immediately once you click ‘Download.’
If you choose ‘Download with LRS Configuration,’ an xAPI connection will be created. All you need to do is enter the endpoint (LRS database server name) and the corresponding credentials (username and password). After entering this information, LesLinq generates a download file that you can connect to your LMS/LRS.
Now supporting WebP files in LesLinq
LesLinq now accepts WebP files in addition to the wide range of supported formats (JPEG, PNG, Adobe Photoshop, Adobe Illustrator, PDF, PowerPoint, etc.). WebP is a file type developed by Google designed to produce smaller image files, which load faster and improve the user experience—something LesLinq always strives for!
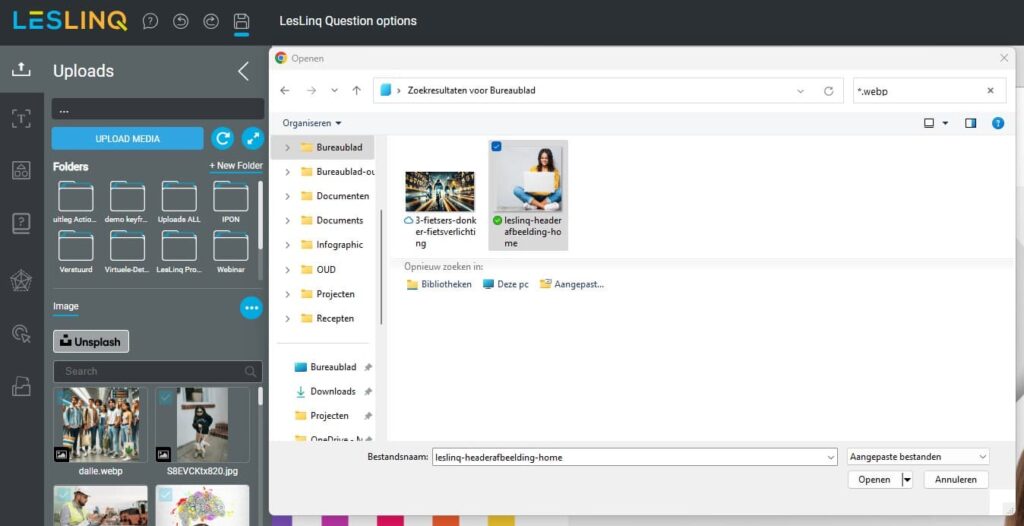
Uploading WebP files is easy. Simply choose ‘Upload media’ from your project and select the WebP file you want to upload.
User Interface updates
This new version of LesLinq includes several updates to the user interface. Depending on the type of LesLinq account you have, some features may not be visible. The changes include:
- Participants versus Users:
In the navigation menu on the left, the categories Particpants and Users have been added.
Users: Users with access to the backend of LesLinq for creating e-learnings/microlearnings.
Participants: Participants receiving the e-learning/microlearning. This new category is now visible to LesLinq platform users. - Distributing projects:
The interface for distributing projects has been simplified. The new page allows you to send the selected project via email, SMS, or both to one or multiple participants from the dashboard. To distribute a project, go to the project dashboard, select the project, click the three dots next to the title, and choose ‘Distribute.’ The simplified screen looks like this: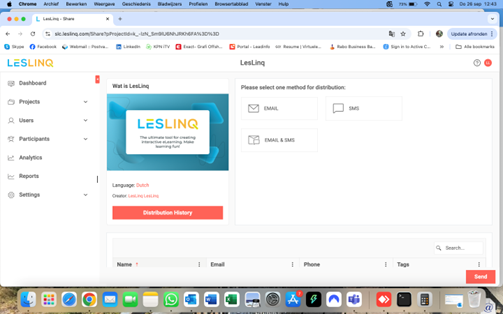
- Distribution history:
For each distributed project, you can view a ‘Distribution History,’ which visually shows which participants the project has been sent to.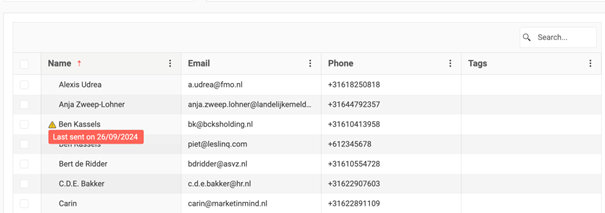
- Tags entry:
The layout for entering tags has been simplified for a smoother experience.
Questions?
Want to learn more about these changes or LesLinq in general? Feel free to contact us by phone at +31 (0)85 105 1917 or via email.
The post New features in LesLinq appeared first on LesLinq.
]]>We’re always working to improve LesLinq, and we’ve added some amazing new features! Here’s a quick overview:
Tagging system
You can now define unlimited tags and link them to both projects and learners. This offers endless possibilities for organizing and distributing your microlearnings.
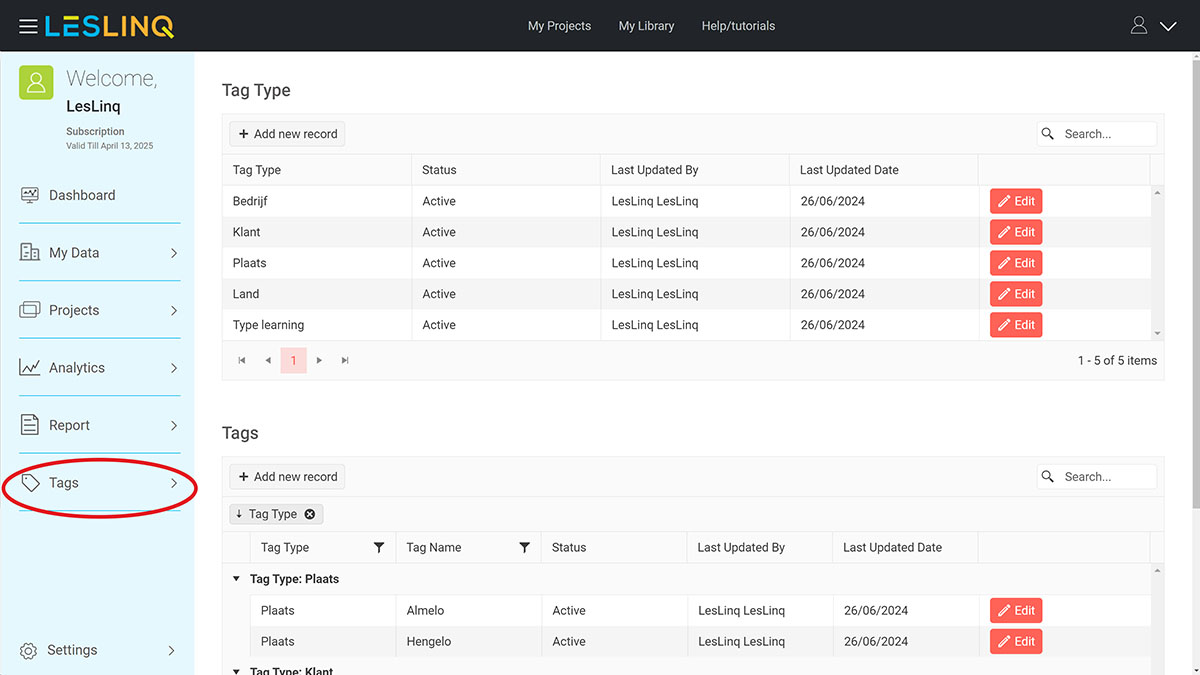
Imagine this: you can create tags for countries, cities, departments, locations, job roles, and more. For each tag type, you can add as many tags as you want. For example, under the ‘Countries’ tag type, you can add tags like United Kingdom, Ireland, Netherlands, Belgium, Germany, etc. You can add tags via the ‘Tags’ button at the bottom left of the LesLinq Welcome screen.
When adding a new project or learner, you can link specific tags to them. The combinations are endless, allowing you to share microlearnings with very targeted groups of learners.
General Survey Question
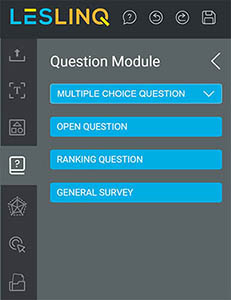 The question module now includes a General Survey question. This type of question is similar to the ranking question but allows for multiple answers.
You can use the General Survey question to gain detailed insights into customer preferences, user experiences, and opinions on products or services. You’ll find this new question type in the Question Module in LesLinq’s left menu.
Create templates from single elements
Now you can create a template from a single element, in addition to grouping multiple elements and their associated actions into a template. When you click on the element you want to template, an icon will appear at the top:
![]()
Clicking this icon saves the element, along with its animations and actions, to your Template library. Want to learn more about creating templates? Check out the knowledge base.
Additional updates
- For General Survey and Open questions, you can now specify whether a question can be skipped. You can also set an action for when a question is skipped using the ‘On SKIP action’ setting.
- The project dashboard now shows if a project has been distributed. Clicking the “View Summary” button opens a pop-up showing who the project has been distributed to, along with options to view results and reports for specific learners.
- For multiple-choice questions with multiple correct answers, scores are now calculated based on the number of correct answers given.
- When distributing a microlearning via email or SMS, it now shows whether the email or SMS was successfully received.
Want to know more?
Discover today how these new features can enhance your training, course materials, or research. We’d love to give you a demo!
The post New in LesLinq: Tagging, General Survey question and more appeared first on LesLinq.
]]>
Recently, we conducted a study to explore the impact of LesLinq on learning enjoyment and motivation. The results are incredibly promising! LesLinq is genuinely making a difference in how people learn. In this article, we’ll share the key findings from our research and how these insights contribute to an enhanced learning experience.
Increased Enjoyment and Motivation
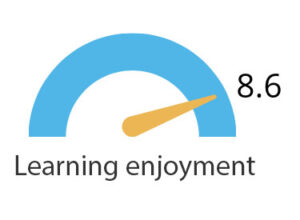 Interactivity boosts enjoyment
Our research shows that the interactive elements of LesLinq, such as quizzes and clickable components, significantly enhance users’ learning enjoyment. Learners find the process more fun and engaging thanks to this dynamic and immersive approach. This not only makes learning more enjoyable but also more effective.
Better content presentation
The use of multimedia and animations helps users understand information better and enjoy the learning process more. A well-designed presentation of content makes a world of difference in how knowledge is absorbed and retained. LesLinq excels at offering visually appealing and informative content that aids learners in grasping the material more quickly and efficiently.
Flexible learning anytime, anywhere
Users appreciate the flexibility to access learning materials on any device, at any time. This makes learning more accessible and fits into the busy schedules of users. Whether you’re on the go or at home, LesLinq allows you to learn wherever and whenever it suits you best.
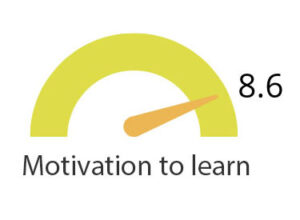 Accessibility increases motivation
A user-friendly and easily accessible platform boosts the motivation to learn. Our research indicates that accessibility is crucial for sustained motivation. LesLinq ensures that everyone can effortlessly access the learning materials, lowering the barrier to starting the learning journey.
User experience and engagement
Familiarity enhances learning experience
Users with more experience using LesLinq report higher levels of both motivation and learning enjoyment. This suggests that becoming familiar with the platform positively impacts the overall learning experience. The more you use LesLinq, the more enjoyable and effective your learning becomes.
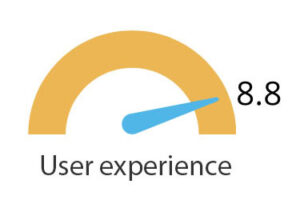 High user ratings
LesLinq scores an impressive average of 4.4 out of 5 (8.8 out of 10) for user experience. This indicates that users are highly satisfied with the platform. The high ratings affirm the effectiveness and user-friendliness of LesLinq.
Improved learning experience
The findings from our research show that LesLinq not only offers an innovative e-learning solution but also genuinely improves the learning experience.
Want to know more?
Curious to learn more about the research or about LesLinq? Get in touch with us—we’d love to help you further!
The post Research shows: LesLinq boosts learning enjoyment and motivation appeared first on LesLinq.
]]> LesLinq introduces an amazing new feature: automatic translations for each employee. This new function makes trainings, e-learnings, and microlearnings accessible to all your employees, regardless of the language they speak.
Automatic Translation in LesLinq
With automatic translation, you create the microlearning in a base language of your choice (e.g., Dutch). Upon distribution via SMS and/or email, the microlearning is automatically translated from the base language to the learner’s preferred language.
Connect with Employees Worldwide
The automatic translation feature ensures that your microlearnings are accessible to all your employees, in the language they speak. This offers several benefits:
- Enhanced Learning Experience: Each employee receives the learning content in the language they feel most comfortable with. This enriches the learning experience and increases effectiveness.
- Reach Everyone: Bridge language barriers and ensure every employee has access to essential training information.
- Efficiency: No more time spent on manual translations. With one click, your microlearning is automatically translated into the learner’s preferred language.
- Consistent Learning Experience: Ensure a consistent learning experience, regardless of the participant’s language.
- Inclusivity and Engagement: By removing language barriers, you give all employees the chance to fully participate and benefit from the learning experiences offered.
How Does It Work in Practice?
- You create a microlearning in a base language of your choice, such as Dutch.
- Before distributing the microlearning, ensure that all employees are listed in the system with their correct preferred language. This can be easily checked in the ‘My Data’ dashboard, where you get an overview of all employees and their set languages. If needed, adjustments can be made with just a few clicks.
- Make sure to create the email and certificate templates in the correct languages once.
- Choose how you want to distribute the LesLinq, via SMS, email, and/or QR code. The microlearning is now automatically translated, and each employee receives it in their preferred language.
Our knowledge base provides a detailed explanation of this wonderful new feature.
Increase Employee Engagement
Enhance the engagement and satisfaction of your employees by giving them access to microlearnings in their own language. LesLinq makes learning more fun and accessible than ever.
Want to Know More?
Do you want to learn more about how this innovative feature can help your organization overcome language barriers and improve the learning experience? Contact us today to discover the endless possibilities of LesLinq or click here to schedule a demo directly.
Embrace the future of learning with LesLinq, where language is no longer a barrier but a bridge to better understanding and growth.
The post Discover the Power of Automatic Translation with LesLinq appeared first on LesLinq.
]]>Good news: LesLinq has expanded with two new question types:
These additions offer users more opportunities to gather and analyze data, enriching the learning and research processes.
Ranking Question
The ranking question, also known as the Rating Scale Question, is a valuable addition for quantitative research. This question type uses a Likert scale, where respondents can express their opinions on a scale from “strongly disagree” to “strongly agree.” By assigning points to each option, researchers can easily quantify and analyze the responses.

Key Features of the Ranking Question:
- Ideal for Quantitative Research: Helps collect structured data that is easy to analyze.
- User-Friendly: Select ‘Ranking Question’ in the question menu and input your question text and answer options.
- Extensive Styling Options: Customize the question and other page elements to your liking.
- Enhanced Insights: Gain insight into participants’ preferences and priorities, aiding in better decision-making.
How to Create a Ranking Question:
- Log in to LesLinq and open a new or existing project.
- Select “Ranking Question” from the question type menu.
- Enter your question text and specify the answer options.
- Save the question and integrate it into your assessment.
Participants receive the link to the assessment via email and/or SMS. Once completed, their responses are recorded and stored.
The results can be viewed in the report section of the project by the content creator.
Open-ended question
The open-ended question encourages critical thinking and deeper understanding, making learning both challenging and rewarding.
Answer Keywords
When creating an open-ended question, you can input ‘answer keywords.’ These keywords allow you to rate and score responses based on predefined criteria.

Benefits of the Open-Ended Question:
- Encourages Critical Thinking: Promotes deeper reflection and analysis.
- Flexibility in Responses: Users can formulate their answers entirely in their own words.
- Keywords for Scoring: By inputting keywords, responses can be automatically scored.
Want to Learn More?
Discover today how these new question types can enrich your research or educational materials. We’d be happy to give you a demo!
Embrace the future of learning and research with LesLinq, where new possibilities are just a question away.
The post New Question Types in LesLinq appeared first on LesLinq.
]]>
Safety within any organization holds significant importance. It’s not solely because employers are legally obligated to establish a secure work environment, but because it embodies a core value that organizations must hold dear. Whether it pertains to a factory, construction site, or office setting, creating a safe atmosphere for employees stands as paramount.
One of the most impactful ways to instill safety awareness among employees is by offering clear safety instructions and comprehensive training. However, how can you ensure that these instructions and training sessions genuinely enhance safety consciousness? Prior to delving into this, let’s delve into the concept of safety consciousness.
The Significance of Safety Consciousness
Safety consciousness transcends mere checkbox ticking on a list. It entails nurturing a mindset in which every employee proactively assumes responsibility for their personal safety and that of their peers. When safety becomes deeply ingrained in a company’s culture, incidents decline, productivity flourishes, and employees feel valued. Effective onboarding instructions and training serve as the bedrock for this transformation.
Here’s how to create effective safety instructions:
1. Tailor Instructions for Relevance
A one-size-fits-all approach falls short in the realm of safety. Every organization is distinct, just as its safety challenges are. Adapt your safety instructions and training to address specific safety concerns that employees might encounter in their roles. This renders the content recognizable and pertinent.
2. Engage Visual Appeal
Frankly, extensive blocks of text rarely captivate. By incorporating visual elements, images, animations, and interactive videos, you demystify intricate concepts, capture employee attention, and sustain their interest. This approach renders the information more digestible and memorable.
3. Foster Interactivity
Prevent employees from slipping into passive learning mode. Passive learning typically results in a “one ear in, one ear out” scenario. Inject interactive components like quizzes, simulations, and real-world scenarios. Encourage employees to actively apply their safety knowledge. Active participation deepens understanding.
4. Embrace Brevity and Impact
Bypass lengthy training sessions, as they often lead to cognitive overload. Dissect the material into manageable segments. Short microlearning modules are easier to assimilate and fit seamlessly into employees’ packed schedules.
5. Integrate Realistic Examples
Share authentic anecdotes, safety incidents, or success stories from real-life experiences. Authentic narratives strike the right chord, amplifying the impact of safety training. Employees bridge theory with practice and comprehend the consequences of their actions.
6. Prioritize Accessibility
Reduce the barrier to commencing training for employees. Steer clear of convoluted login procedures. Furnish direct training access via a personalized link delivered through SMS or email.
7. Quantify Progress
Tracking individual results within a Learning Management System (LMS) offers multiple merits. It sheds light on training progress for evaluation and feedback. Additionally, it motivates employees to complete the training by creating a sense of accountability. Knowledge that results are recorded encourages a more serious approach to training.
8. Recognize Learning as a Process
Safety and safety consciousness aren’t isolated instances. They constitute ongoing processes. Learning about safety is a continuous journey. Extend avenues for perpetual learning about safety practices, regulations, and updates. Maintain the flame of safety alive through regular refresher courses.
LesLinq: Empowering Effective Safety Instructions
You may now be intrigued about a suitable platform for crafting safety instructions and training. Enter LesLinq, a microlearning solution that enables the creation of impactful safety instructions and training with genuine effects. LesLinq’s microlearning modules not only deliver results but also engage and entertain.
Highlights at a Glance:
Flexibility in customization to cater to the target audience
Through LesLinq’s Content Creation Tool, you generate content finely tuned to your company’s specifics and the audience’s needs. This ensures that employees receive information pertinent to their unique tasks and responsibilities.
Elevated Engagement
LesLinq’s visually arresting content and interactive elements maintain employee engagement throughout the training process. Think visual aids, interactive components. The question module keeps participants alert by inserting questions at opportune times. It’s training, but enjoyable!
Exceptional Accessibility
LesLinq’s SMS distribution feature ensures that everyone gains access to safety instructions without the hassle of app installations or navigating complex login procedures. You can effortlessly reach every employee within the company, regardless of their location.
Progress Tracking
Within the Learning Management System (LMS), meticulous tracking of employee progress is achievable. Determine if everyone completed the safety instruction or training, and review responses to questions. You can even set a minimum pass score and award certificates.
Adaptability
Safety rules evolve, and so does your training. Within LesLinq, adapting content and sharing new safety information is seamless. This ensures that everyone stays abreast of the latest developments and regulations.
Seeking Further Insight?
Safety isn’t just a term; it’s a modus operandi. LesLinq is poised to facilitate this transformation with ease and excitement. Are you prepared to elevate safety in your organization? Familiarize yourself with LesLinq and arrange a demo. Schedule your demo directly in Calendly or call Chris Hof at 0682 077 845.
The post 8 Tips for Creating Effective Safety Instructions appeared first on LesLinq.
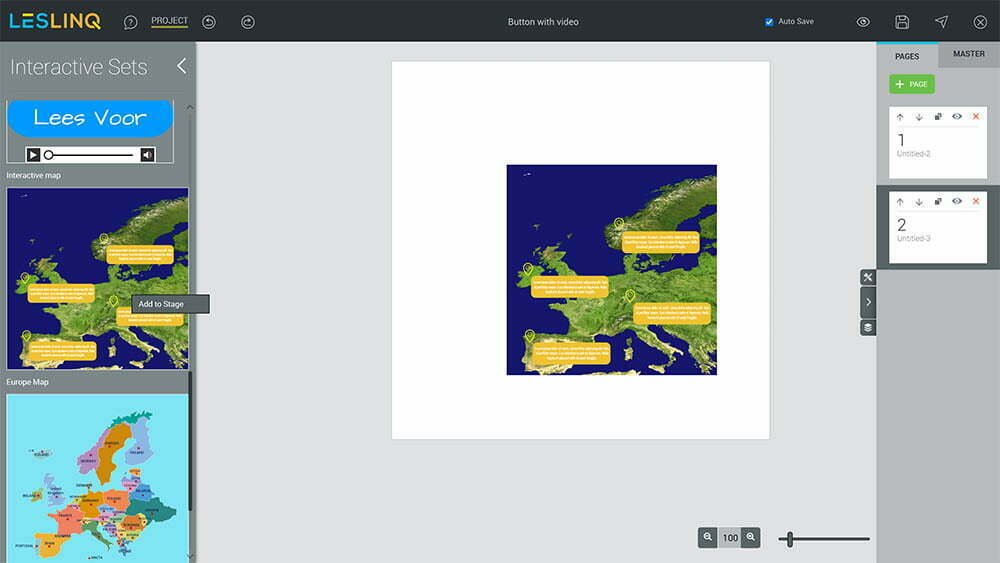
]]>Recently a few new Interactive Sets have been added to Leslinq. One of them is the Interactive Map. In this article we’ll explain how to add that Interactive Set and how to change it.
Add the Interactive Map to your project
To add the ‘Interactive Map’ Interactive Set to your project:
– click on the interactive sets in the toolbar
– select ‘Interactive Map’
– click on ‘Add to stage.
Grouped layers
By default the layers of an Interactive Set are grouped. By double clicking on the Interactive Set you are able to open the layer elements and to adjust them.
Changing the background image or adjusting the size of the image
Double click on the image of the map until the image editor appears.
If you want to replace the image with another one, click on the ‘Choose from library’ button and upload your image, choose an image from Unsplash or enter an image link.
To change the size of the image, you can select the bottom right corner of the image and scale until you’ve reached the desired dimensions.
Changing the pointers on the map
To change the pointers on the map, double click on the pointer until the icon editor appears on the left side of your screen.
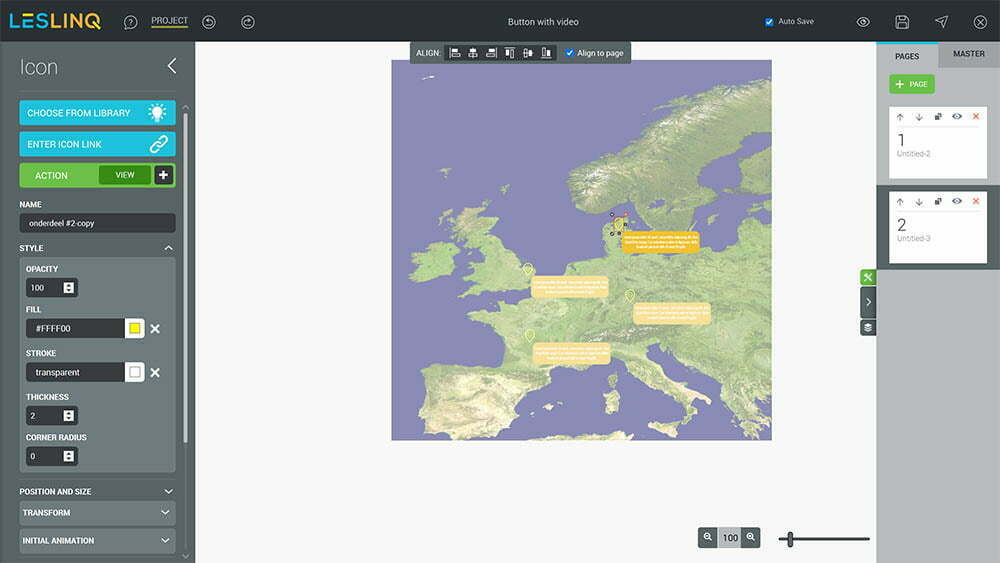
Now you can replace the icon with your own image by clicking on ‘Choose from library’ or you can adjust the style (opacity / fill and stroke color border / radius of the icon used). To change the animation settings, scroll down to the ‘Initial Animation’ tab. The default animation settings of the pointer are:
- Slide in from top
- Duration 0,8 seconds
- Delay of 0,3 seconds
- Easing is bounce
- Visible on start: yes
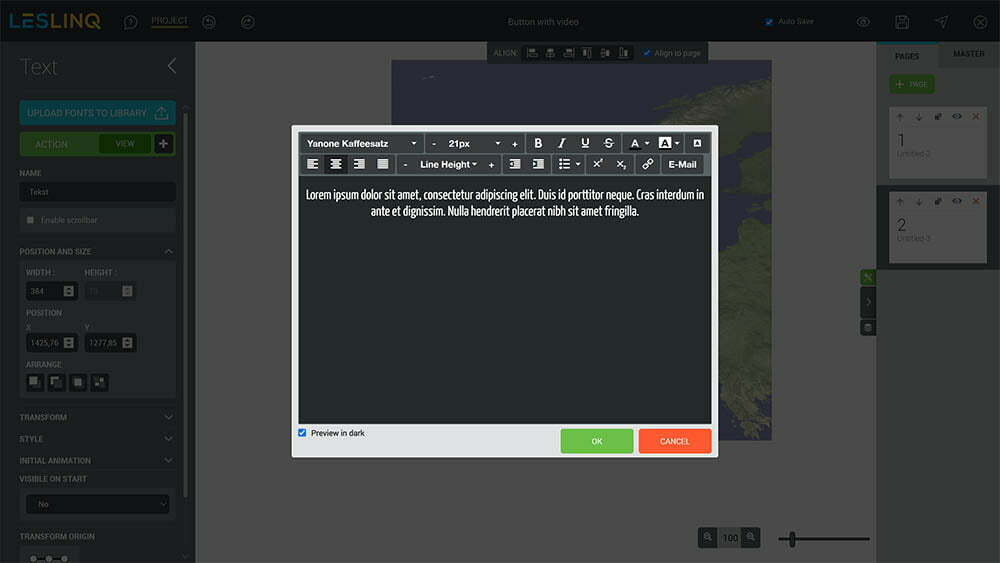
Changing the text box settings
To change the settings of the text box that appears in mouseover, double click on the text until the text editor opens. Change the text, font type and font color and click on ok.
Changing the background of the text box
To change the background settings of the text box, double click on the background shape until the shape editor opens. You can change the dimension of the background shape by selecting it with your mouse and drag until you’ve reached the desired dimensions.
From the shape editor panel you can choose a different shape or change opacity, font, font type, font color and size, shape fill color, stroke and border radius of the current shape.
Save pointer and textbox as Interactive Set
You can adjust the settings of each pointer and text box individually, or you can change 1 pointer and text box and save it as a set, so you can reuse them in your project. To do that, click on the right side of your screen on the layers icon. Then, doubleclick on the pointer or text box you want to use until you see 3 layers (for text, background and icon).
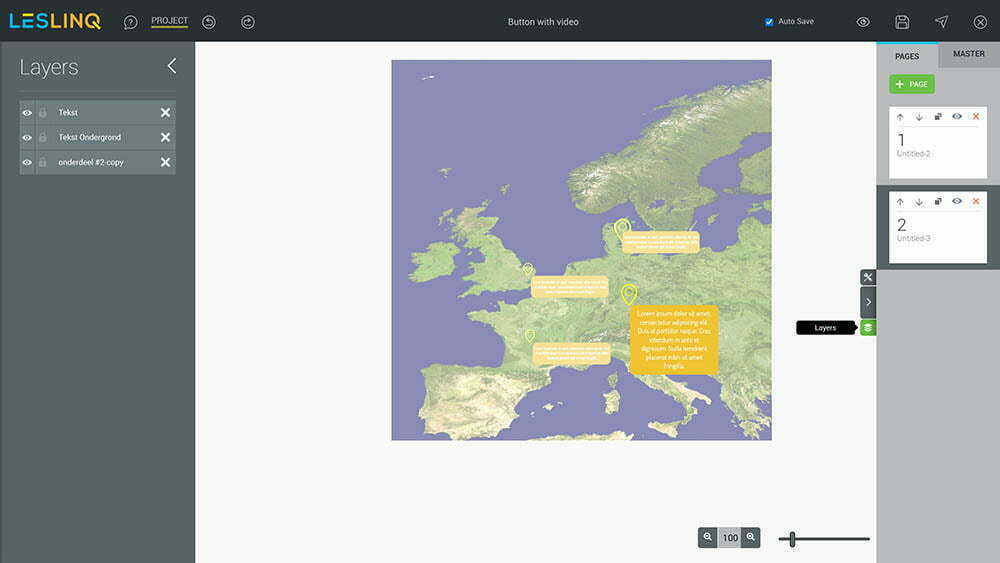
Note: if you don’t see the right layers, leave the canvas (for instance by clicking on the page button at the right side of your screen), than go back to your newly added Interactive Map, open the layers pane and keep on clicking on the pointer or text box you want to use until you see the right layers.
Click on the upper layer, press Shift and click on the bottom layer. Then, click on the green button ‘Group selected elements’.

Give your set a name and click on ‘Save in my sets library’.
Now, when you go to the Interactive Sets in the toolbar, your newly saved Interactive Set is added to the Interactive Sets library. Click on add to stage and as as many Interactive Sets as you wish.
Finished editing?
When you’re done editing, save your project and click on the preview icon at the top right of your screen to see the end result.
The post How to adjust the Interactive Map appeared first on LesLinq.
]]>Recently a few new Interactive Sets have been added to Leslinq. One of them is the Voiceover button Interactive Set. In this article we’ll explain how to add that Interactive Set and how to change it.
Add the Voiceover button to your project
To add the ‘Voiceover button’ Interactive Set to your project:
– click on the interactive sets in Toolbar
– select ‘Voiceover button / knop’
– click on ‘Add to stage.
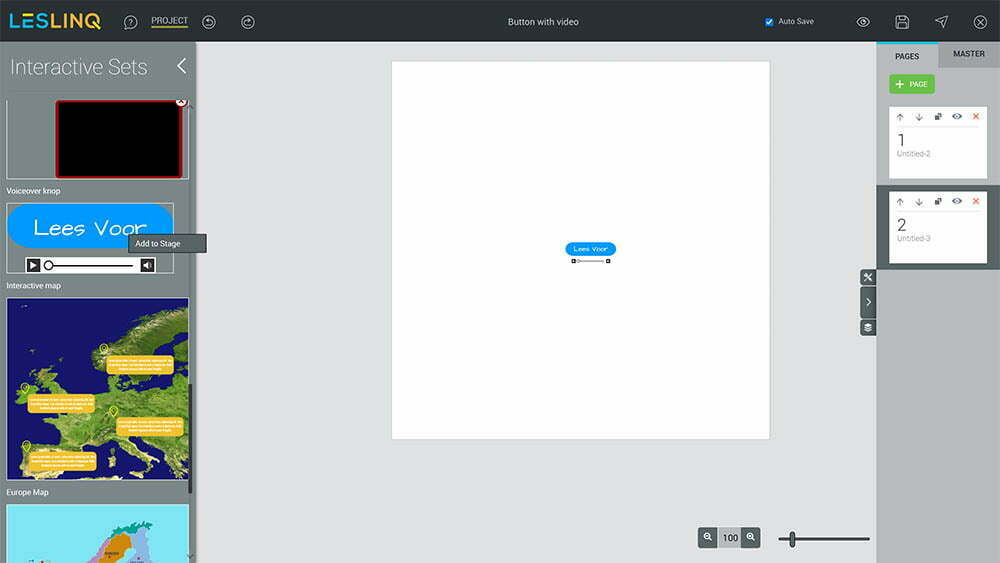
Grouped layers
By default the layers of an Interactive Set are grouped. By double clicking on the Interactive Set you are able to open the layer elements and to adjust them.
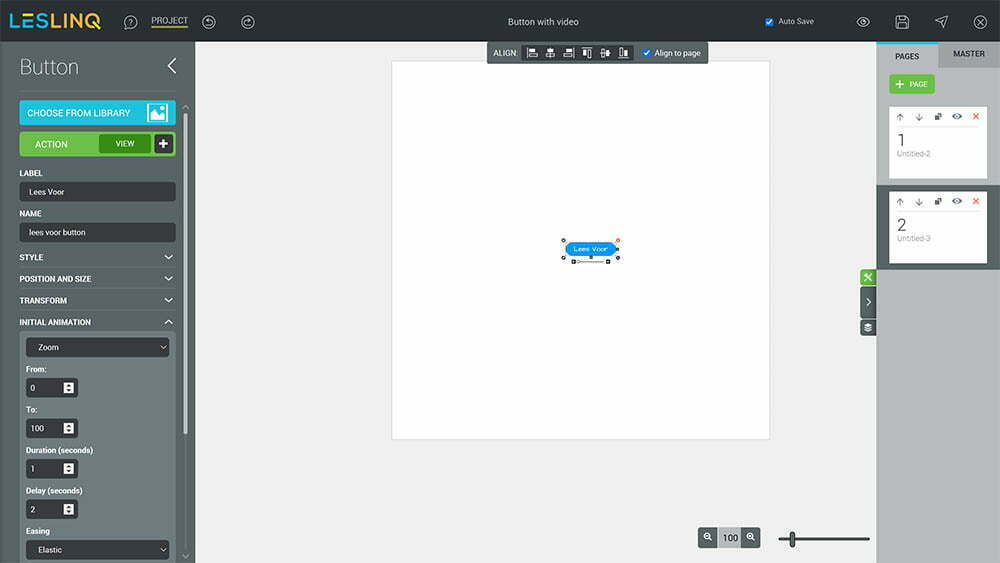
Changing the button style
Double click on the blue button until the window with the button editor opens. Now you can change the text (label), style (opacity, font color, font size, background color, stroke and border radius), position, size and initial transition settings. The default initial animation settings of this Interactive Set are:
- Zoom
- From 0 to 100 in 1 second
- Delay of 2 seconds
- Easing is elastic
- Visible on start: yes
You can play with these values and change the animation setting of the button to your wishes.
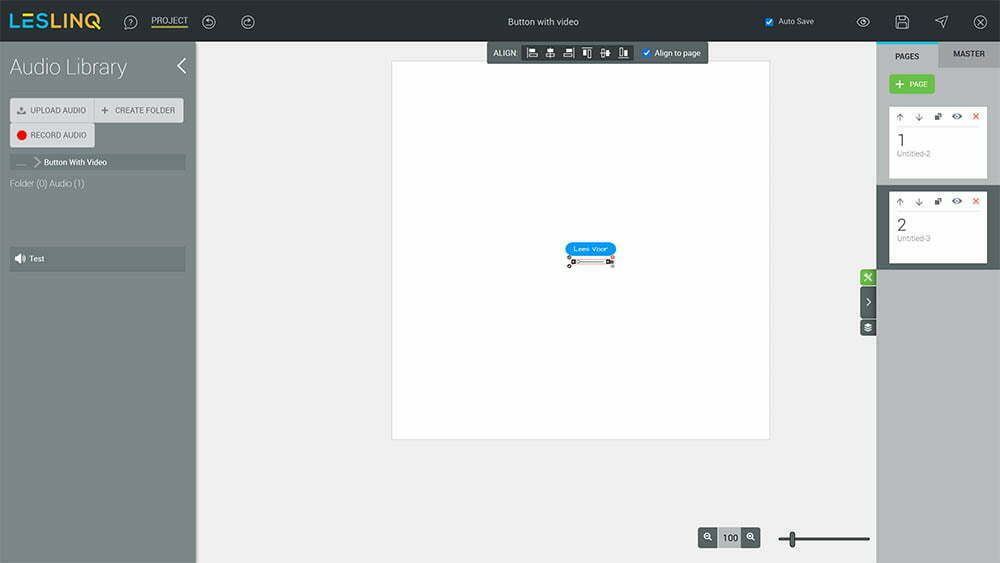
Changing the audio file
Double click on the audio file until the audio library opens. Now you can link to an audio file you’re your library, upload an audio file or record your audio instantly.
Finished editing?
Save your project and click on the preview icon at the top right of your screen to see the end result.
The post Adjusting the Voiceover Button Interactive Set appeared first on LesLinq.
]]>Recently a few new Interactive Sets have been added to Leslinq. One of them is the Animated Title Interactive Set. In this article we’ll explain how to add that Interactive Set and how to change it.
Add the Animated Title to your project
To add the ‘Animated Title’ Interactive Set to your project:
– click on the interactive sets in Toolbar
– select ‘Animated Title’
– click on ‘Add to stage.
Grouped layers
By default the layers of an Interactive Set are grouped. By double clicking on the Interactive Set you are able to open the layer elements and to adjust them.
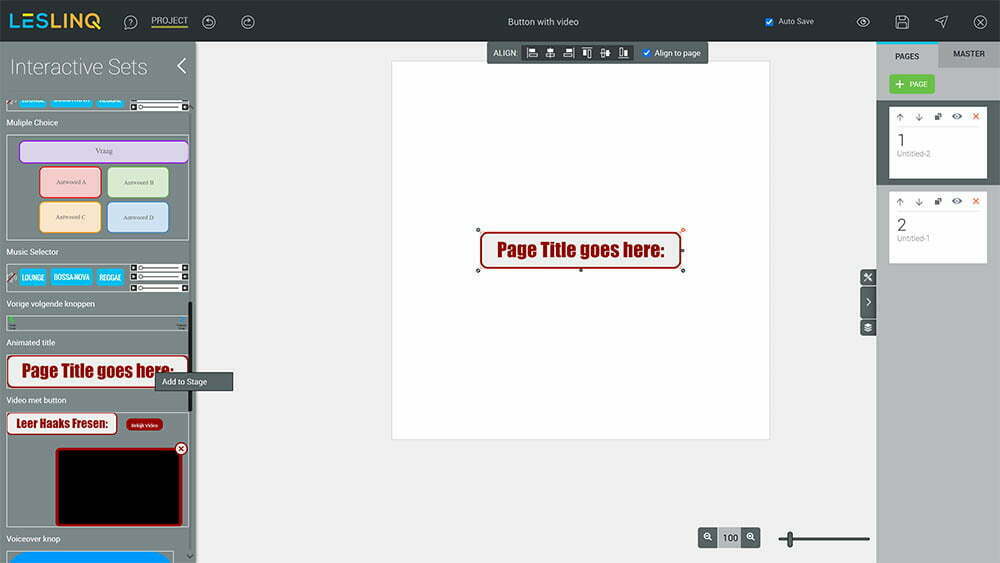
Change the text of the animated title
Double click on ‘Page title goes here’ until the window with the text editor opens. Change the text, font type and font color and click on ok.
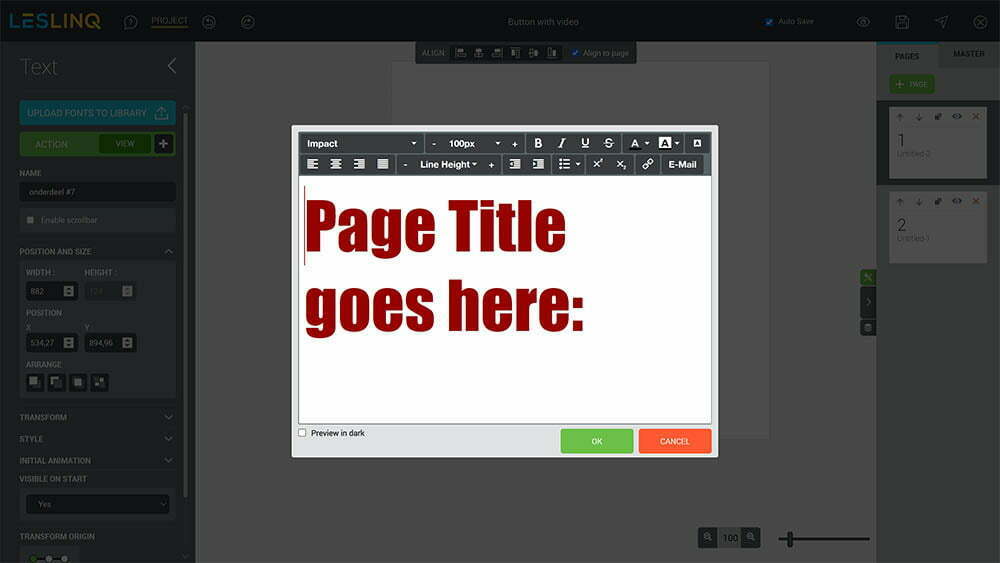
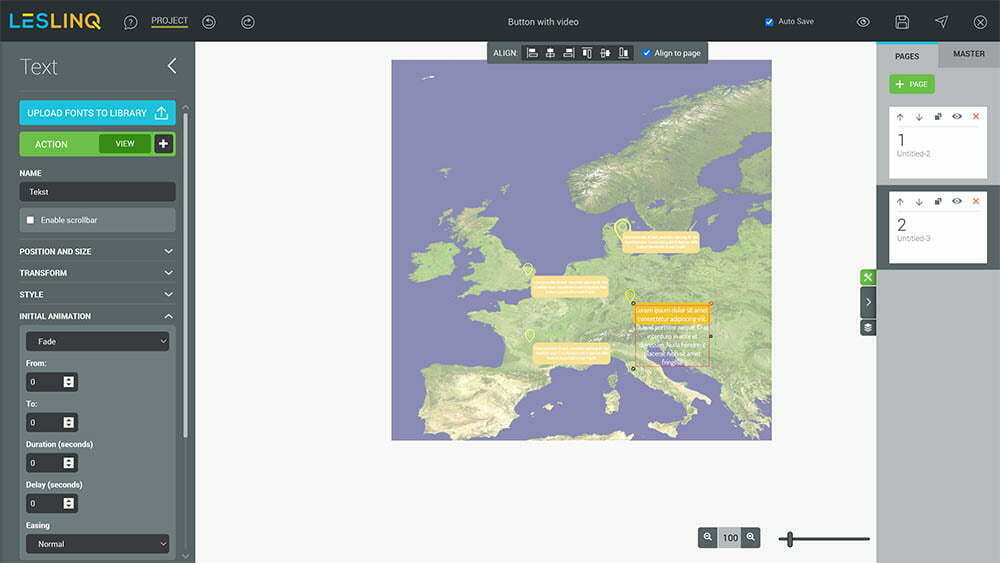
Change the way the title appears
To change the appearance of the page title text, click on the properties panel (at the right side of your screen). Now you can change the settings of the page title text, like position and size, transform (scale), style (opacity) initial animation. The default initial animation settings of the text layer of this Interactive Set are:
- Fade
- From 0 to 100 in 0,7 seconds
- Delay of 0,5 seconds
- Easing is normal
- Visible on start: yes
You can play with these values and change the animation setting of the text to your wishes.

Finished editing?
Save your project and click on the preview icon at the top right of your screen to see the end result.
The post Adjusting the Animated Title Interactive Set appeared first on LesLinq.
]]>